 1 Comments
On this episode of BIY (Bwog-will-show-you-how-to-do It Yourself), Staff Writer James Perry will show you how to make use of that sweet, sweet $10 of printing a week and bind your own books for class.
Does your [insert humanities subject here] course require you to read seventeen full books a week? Do you like to annotate your readings? Do you like the feeling of flipping through a book and being able to actually tell the progress you’re making? Do you really, really dislike having a billion loose pieces of paper after printing out a reading? Are you just interested in bookbinding?
If any of the above applies to you, then, my friend, you should read this tutorial. Make use of your printing dollars and copyright expiration and bind your own books! Follow this tutorial and you’ll be on the path to being a bold, beautiful bookbinder in no time.
Step 1: Finding Your Book
If the reading you’re looking for was written prior to 1923, it’s in the public domain and you’ll very likely find it online for free (check out gutenberg.org)! If it wasn’t, it could still be in the public domain – a quick search for a free PDF will probably find it for you.
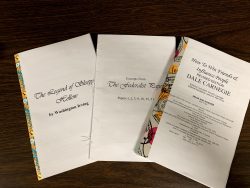
Step 2: Copy the Section(s) You Need and Paste Them in a Word Document
Straightforward. If you only need certain chapters or sections, don’t waste paper! Just copy and paste the parts you need.
Step 3: Formatting
This is probably the most difficult part, and it’s not even that hard!
-
- 1
-
- 2
-
- 3
-
- 4
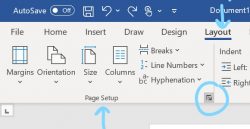
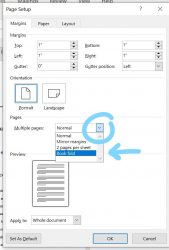
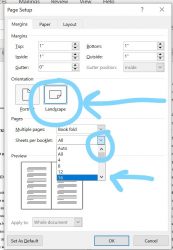
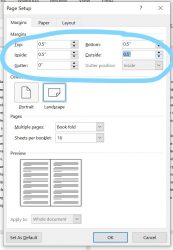
In your Word document, go to Layout > Page Setup and then click the expand button (1). An expanded menu should pop up. Under Pages, select Book Fold under the Multiple Pages drop-down menu (2). The menu should change. Make sure that the orientation is in Landscape, and again under Pages select 16 – this will arrange your pages in a signature of four pages, which is how most books are bound (3). Finally, change the Margins to your preference – 0.5″ on all sides is a good amount for annotations (4).
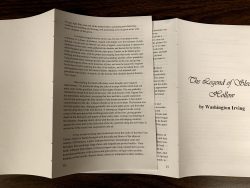
After all this, your document might look a little funky, so you can edit it according to your preferences. I like to make a title page, leave a page blank after that, and then start the rest of the book. To conserve pages, I like to use 1.15 line spacing, but it depends on your preferences.
Step 4: Page Numbers
This is THE MOST IMPORTANT STEP!!!! because it’ll show you which pages go where after you print and can eliminate some confusion when you’re folding in further steps.
-
- 1
-
- 2
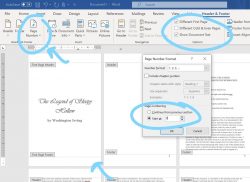
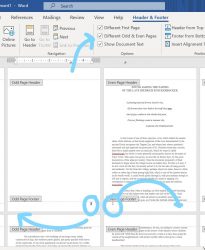
Add page numbers by double-clicking in the top or bottom margins of any page to access the Header & Footer > Header & Footer section. Click Page Number to get the drop-down menu, place page numbers according to your preference, and (if you have a front page) click Format Page Numbers to start the page count at 0. Hide it by checking Different First Page under the Options section and deleting the page number (1). If you want to get real fancy, check Different Odd & Even Pages and put your odd and even page numbers on opposite sides – but be careful of where the page numbers are depending on how you formatted your book (2)!
Step 5: Print!
This is pretty straightforward.
Step 6: Separate and Fold Signatures
-
- 1
-
- 2
-

- 3
-
- 4
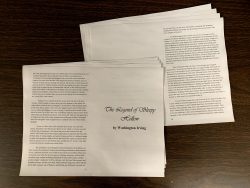
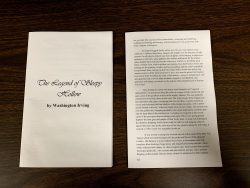
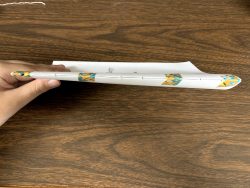
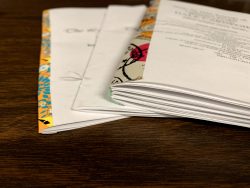
Once you’ve printed, you’ll get a stack of paper (1). If you printed 16 pages per booklet, that means that each of your signatures should have 4 sheets of paper in them. Separate the signatures (2) and fold each page individually (3), using a hard edge to define the crease of your fold. It’s important that you fold the right way – once you put the pages back together you should be able to flip through them without the numbers skipping (4).
Step 7: Make Some Dots
-
- 1
-
- 2
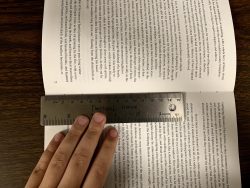
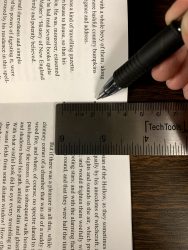
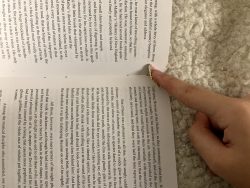
On the middle page of each signature, mark at 2cm, 4cm, 9.5cm, and 11.5cm from the bottom (1), and at 2cm and 4cm from the top (2). Make sure that these measurements are accurate and precise for each signature, because if they’re off your final product won’t turn out as sturdy.
Step 8: Do The Hokey Pokey
-
- 1
-
- 2
And by that I mean poke some holes! Use something pokey, like an enamel pin, safety pin, or earring post, on a soft surface that can recover from hole-poking, like a carpet, throw blanket, or a towel, to poke holes where you marked (1). Make sure that all of the pages in each signature are lined up properly, because once you poke, you can’t un-poke. Your poked holes should line up on each signature (2).
Step 9: Prepare the Threads of Fate
-
- 1
-
- 2
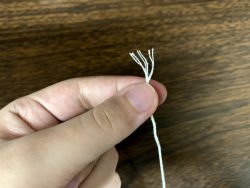
If you don’t have access to the mythological threads of fate, embroidery floss or regular sewing thread is fine. If you use embroidery floss, cut about a foot and a few inches to be safe, or the distance from your wrist to your elbow. If you’re using regular thread, double that length and thread your needle to the middle of the thread to double up. Here I’m using embroidery floss, which is really thick, so I separate the woven strands into smaller groups (1, 2). Thread through a sewing needle.
Step 10: Bind the Booklets!
-
- 1
-
- 2
-
- 3
-
- 4
-
- 5
-
- 6
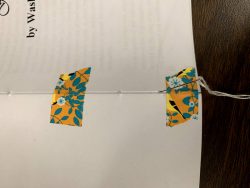
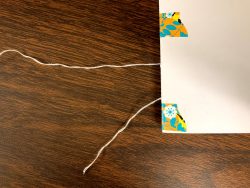
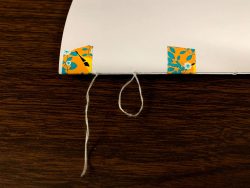
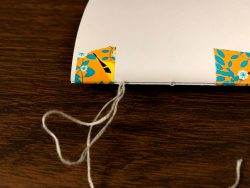
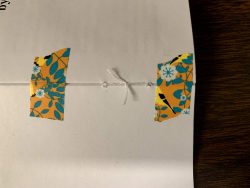
Use a cute little bit of tape in between each group of poked holes to hold the booklets together, making sure that the poked holes align (1). This would be satisfactory, but the middles fall out – SO, we need to sew them together. Starting from the outside of one signature, put the needle through a hole, leaving out about an inch and a half to two inches of thread to tie later (2). Hold the end of the thread tight and come through the middle of the signature out on the other side (3). Then, put the needle through the nearest poked hole in the other signature, making sure to pull tight to connect the two signatures (4). Do this on the second pair of poked holes, and repeat once (5). When the thread comes out on the opposite side of the loose end of thread, un-thread your needle and tie the ends together, then cut off any excess thread (6). Repeat the process for each set of poked holes.
-
- 7
-
- 8
-
- 9
If you want, you could leave it like that (7), you could take the tape off (8), or you could add a decorative tape strip on the bound edge to hide your loose threads (9). If you have more than two signatures, make sure that each signature is included when you bind the book; you may want to tie each signature together on its own before sewing all the signatures together. If you only have one signature, you can staple the middle instead of sewing it.
Step 11: Enjoy!!
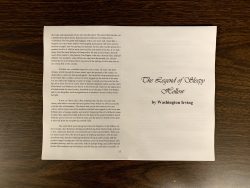
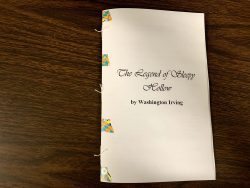
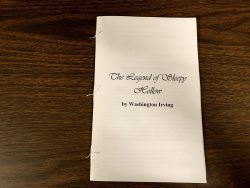
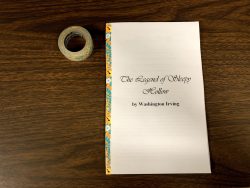
Once you’ve finished all of the above steps, you should have a cute little book on your hands!
Any length of book should work, and it’ll lay flat when you open it up. You could use this method to make small sketchbooks, notepads, or other useful little booklets! You can play around with these instructions to find what works best for you and to make whatever you want!
Now go, and bring forth BOOKS!
all images via the bookbinding bwogger themself

1 Comment
@Anonymous Are you the singer for Kero Kero Bonito?