 0 Comments
It’s really not as hard as it seems.
Class registration can be tough. Especially at Barnard, which uses a different registration system than the rest of the University. If you’re a first-year student—or anybody, really, if you just have a scant memory—you likely have very little awareness of how the system works. Luckily we’ve compiled a step-by-step guide on how to register for classes at Barnard!
Before we begin, we highly, highly recommend doing this entire process on your computer. While you can use the website on your phone, the registration interface is much easier to deal with on your computer.
- Navigate to selfservice.barnard.edu.
I save this site on a bookmark I titled “Classes” in order for easy access. Trust me, you’re not going to remember that the URL is called “Self Service” down the road—it’s far too arbitrary of a name.
- Add classes to your course plan.
After you log in and complete the Duo two-factor authentication, you should see this screen:
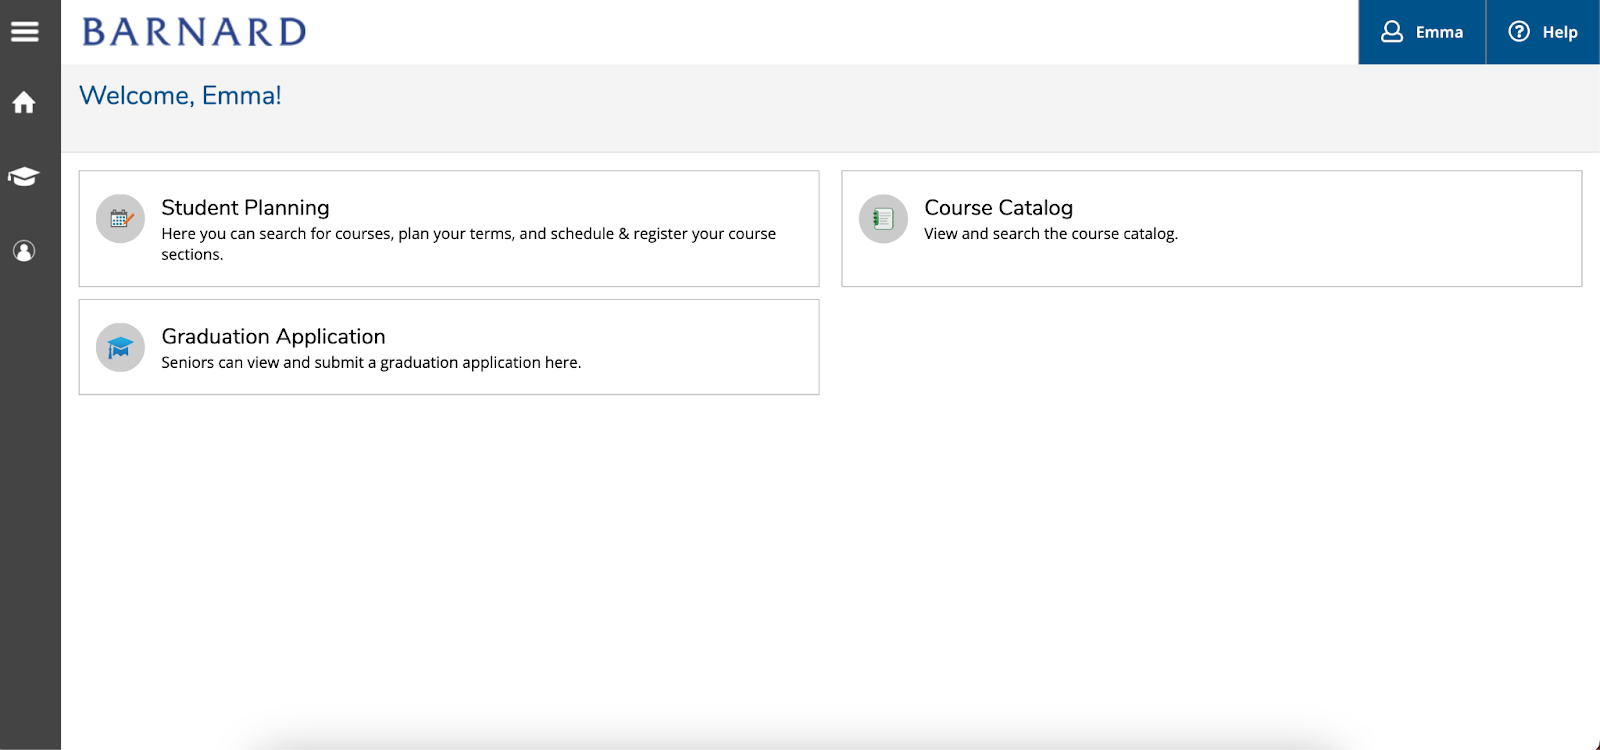
Next, you need to add classes to your proposed schedule in order to unsuccessfully attempt to sign up for them later. Click Course Catalog to do so.
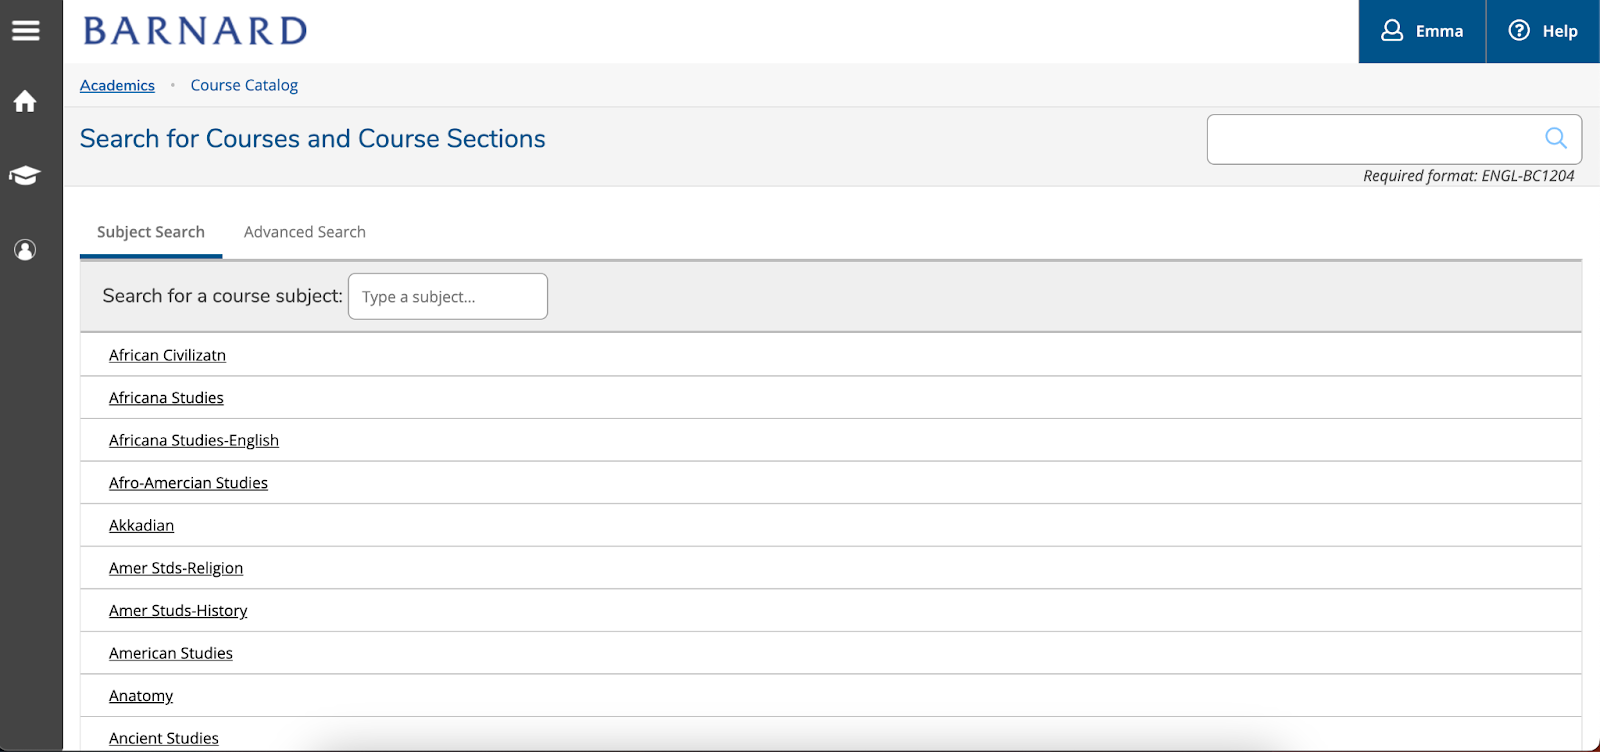
Now, you’ll see this screen:

In the search bar above, you can search for possible classes. Although it reads Required format: ENGL-BC1204, this isn’t true. While typing in a class by its code will make that class show up at the top of your screen, you can really enter anything into the search bar.
But wait—how do you know what classes you want to take? Or should take? I’d recommend thinking of both your Foundations core curriculum requirements, as well as your major/projected major requirements. Classes that fulfill the Foundations requirements can be found on Barnard’s Slate website, whereas major requirements can be found on the major’s website. However, it’s best to search for all classes offered at Barnard and Columbia on Columbia’s Directory of Classes. The best way to go about this is by compiling a list of all the classes you need to take and want to take.
Don’t forget the Subject Search tab! If you want to take a course in a specific department, this can be really useful. I’ve never used it myself, as whenever I want to take a class on a specific topic I often find similar classes across departments, which opens me up to new disciplines. However, this can help if you really want to narrow down your search or try to fulfill your major/minor requirements.
If you’re up to it, the Advanced Search tab could be your best friend. I always select the upcoming term in the Term dropdown box, as it ensures that all the classes I search for are actually being offered the next semester. Although you can still add classes to your schedule that have no term attached to them, you can only actually sign up for classes that are in the following term.

The Meeting Start Date/Meeting End Date boxes, on the other hand, really don’t mean anything—they’re just the start and end date of the courses, which usually aren’t even specified super early on. I wouldn’t type anything there.
Courses And Sections essentially acts the same way as the Subject Search tab mentioned above. It’s useful in this case if you’re trying to find a class in a specific department that also meets additional parameters.
Days Of Week—now this is useful. Classes straight up won’t be offered on Saturdays and Sundays, but if you really don’t want to take a Friday class, then you can just mark the Monday–Thursday boxes and leave it at that. Ignorance (of Friday classes being offered) is bliss!
Time Of Day unfortunately won’t be of much help to you. However, Time Starts by and Time Ends by can help you avoid 8:00 or 8:40 classes, as well as evening classes.
Course Type supposedly filters courses based on meeting Barnard core curriculum classes—First-Year Experience classes, Distributional Requirements, and Modes of Thinking classes. I’ve never used it myself so can’t attest to how accurate it is, since the list of classes that fulfill these requirements can either be updated or petitioned to be updated down the line.
Common Error When Adding a Course to your Plan
As mentioned previously, a course needs to be assigned to the upcoming semester in order for you to actually register for it later on.
Here, I’ve searched for “Psychology” without checking the Fall 2023 box. While I can add all of these courses to my plan, none of the specific courses in this screenshot are being offered in Fall of 2023.
Now, I’ve clicked the Fall 2023 box on the left. The only courses that will show up now will be the ones with available sections, meaning they’re being offered in the upcoming semester. Once you’ve added a course to your plan, the page will reload (unfortunately) and you’ll be left with a yellow box reading “This course is planned.”

- Add classes to your schedule.
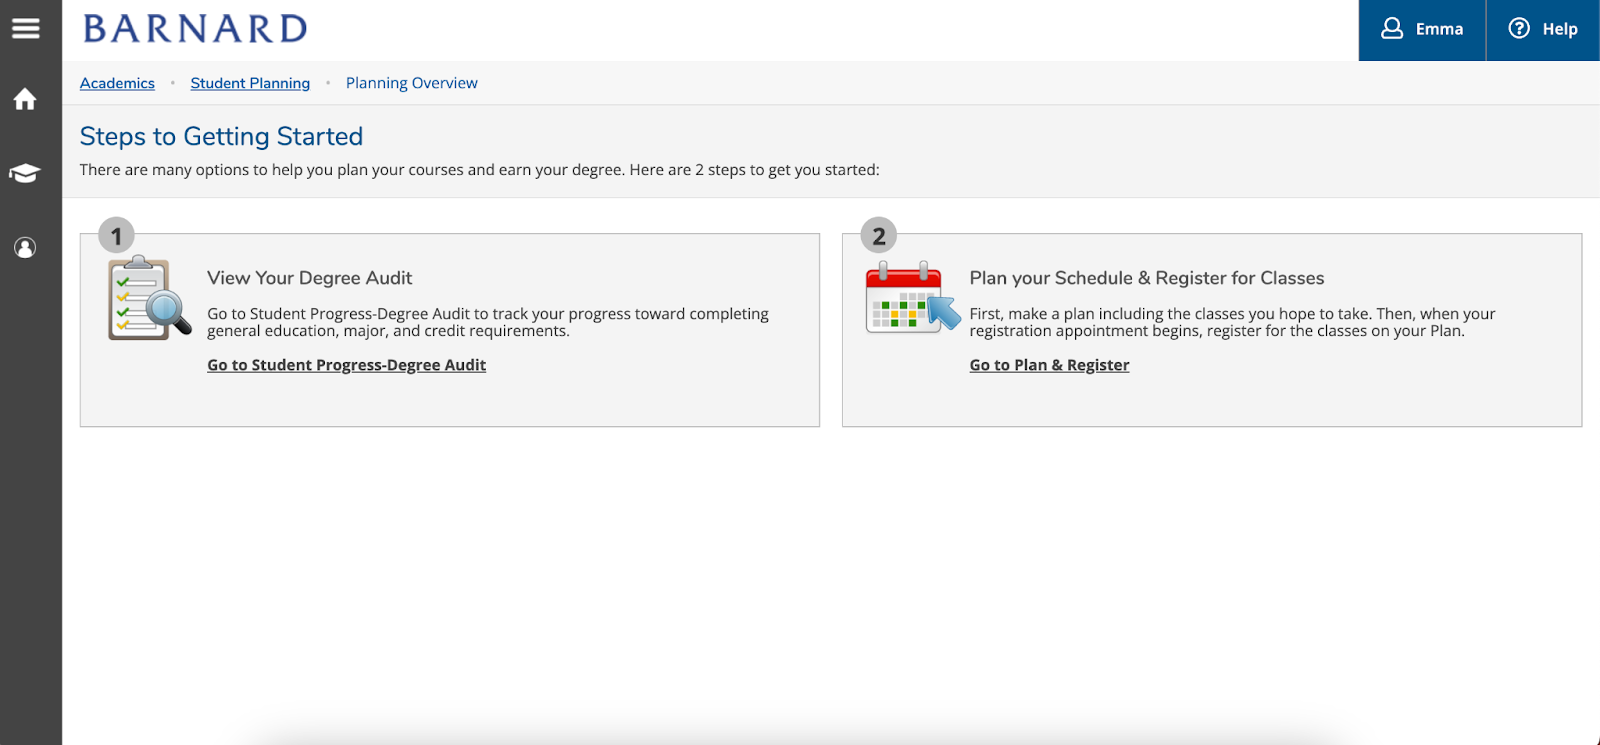
Now, you’ll need to navigate to your Student Planning page. The easiest way to do this is to click the home button on the top left, which will take you back to this screen we saw earlier:
Once you click Student Planning, you’ll see another crossroads. Since you’re trying to register for classes (or at least develop a mock schedule), you’ll click Plan your Schedule & Register for Classes.
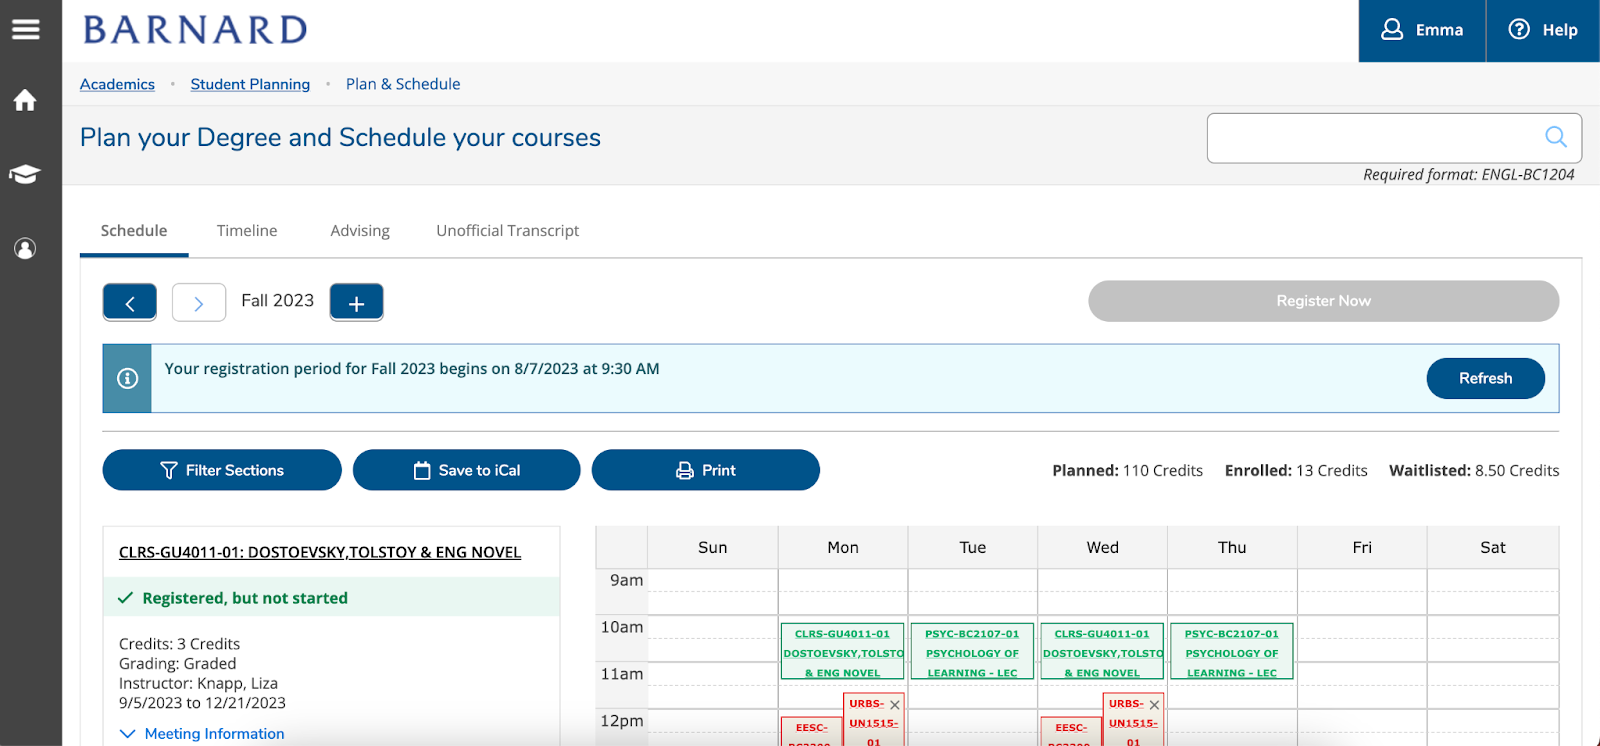
Now you’ll see your course schedule. Make sure it’s the one affiliated with the upcoming semester. In this case, we see the words Fall 2023 to the left of the white arrow on the left side of the screen. You can use the blue arrow to navigate to previous (or upcoming) semesters.
On the left side of your screen, you’ll see a list of all your classes you previously added to your course plan. However, this doesn’t mean they’re in your calendar yet. In order to add them, scroll to the desired class, click View other sections, and click the yellow box corresponding to the class. Then, the class will show up on your schedule.
Some classes have multiple sections. In this case, you can use the Filter Sections feature to choose sections depending on availability (open classes), location, day of week, time of day, instructor, and topic (if applicable). Since classes hardly have more than a few sections, I haven’t used this feature, but it’s there for a reason!
Something that’s important to remember is that you can add classes that meet at the same time (or overlapping times) to your schedule. However, once you register for classes, you can only register for one of these conflicting courses.
While planning out your classes, take into account the feasibility of your schedule. If you really want to take two classes but they have conflicting schedules, then you’ll have to make a tough decision. If you have two classes back-to-back that are extremely far away from each other (e.g. a class in Knox and another in SIPA), it’ll be tough to get to your second class in time. However, I can attest that the journey from Milbank to SIPA takes roughly seven minutes. Do with that what you will.
It’s also always a good idea to add as many classes to your schedule as you can fit. Once you register, you’re going to want to over-enroll. This ensures that you can test out different classes during the shopping period (the first two weeks of classes) to see which you want to keep and which you want to drop. If you’re an underclassman, this also means you’ll likely be put on a lot of waitlists. But don’t worry—that’s just how this process works. As people start to drop classes during the shopping period, you’ll be able to register. Either way, you’re allowed to attend class sessions of classes you’re waitlisted for during the shopping period.
- Register for classes!
You’ll know your registration period by looking at the blue box in the center of your screen:

Once your registration period begins, you’ll be able to start registering for classes (by clicking the Register Now button above and to the right of the blue box) and joining waitlists. Remember that you can only join three waitlists at a time, so choose wisely.
Once you’ve determined your finalized schedule, you can save your schedule directly to your iCalendar (if you use Apple devices) by clicking the Save to iCal button or print your schedule by clicking the Print button. Either way, it’s a good idea to at least take a picture of your schedule in order to remember it, as well as write down your class location and start/end times. Good luck—you’ve got this!
Still utterly confused? Either reach out to your academic advisor, email registrar@barnard.edu, or comment below.
Barnard Self Service Portal via Emma Burris.
